Monday, March 31, 2008

One last Tie The Knot


When...maybe not. I still have some diecut adhesives left and paper left to make more! But here is the last of those I had already made up to show that you could make additional regular sized cards from the 1/2 kit, too! This one I covered the up saying on the layered square with a flower and used a strip of the DSP paper going down the left side. White taffeta ribbon is wrapped around it. I like to impress on my classes that you CAN layer the adhesive diecuts! It gives them dimension! Again...I must say that this is just the prettiest kit!

I still have one thing to prepare for tomorrow night's Technique Class...then need to run the sweeper under the tables...I'm amazed at how those little dimensional papers get ALL over the floor!

Hope you have a good evening...Cheers to You!

Sunday, March 30, 2008

Always


Yesterday, I spent some time doing online challenges with two friends, Lisa and Mary! I had a blast joining them...they have done this frequently in the past, but it was my first time. We selected sketches, then a color combination, stamp set or accessory to use with that sketch. It was interesting to see how similar two would be...maybe using the same color values, or picking the same stamp set to use...but not the same two of us all the time!

For this card, we used the sketch layout and needed to use the stamp set Always. This was the one that Mary and I used similar color values. The color combination I used was Not Quite Navy, So Saffron, Mellow Moss and Purely Pomegranate. I decided to dress up the scallop along the bottom with one of the circle flowers in the set. It is difficult to see, but I did pierce the centers of each of the scallop flowers. One of the new Stylized Silver Hodgepodge ribbon slides is placed with the Pomegranate DS ribbon. I also used Glossy White for a more vibrant look to the bird and leaves. I really liked this layout and will be using it again soon!

A couple of the cards we did, I will save until after my classes next week and then share them with you. I want my class members to be surprised!

Enjoy your Sunday!

Friday, March 28, 2008

Blogger's Challenge #40 - Spring Flowers


Well...I've fussed with this card enough! I kept diddling and diddling with it, without it getting much better. I think it is the white background I don't like on it...cause I do like the center part of it! Oh well...time to move on!

I haven't used this set, Doodle This, in ages! It is one of those sets that I LOVED when it first came out (Spring last year?) and used it SO much that I kind of burnt myself out on it. But...I saw it sitting there...so unloved for so long...that I couldn't resist pulling it out and working with it a little.

The background is the scroll stamped in Certainly Celery on Whisper White. Then I used a couple designs from the Flowers for You designer paper. The large flower I stamped once on Watercolor paper and blended the outlines with my aquapainter...but I think it needed more...so I added the extra layer of flower with Regal Rose on Pretty in Pink cardstock. Both flowers are popped up, then curled backward towards the card for some dimension. The center is So Saffron with Iridescent Ice over it, as well as the Certainly Celery leaves...so they prettily sparkle! Then I added a green Rhinestone brad to the center. Like I said...I kept tweaking and tweaking it...lol! I used the Round Tab punch to add the words For You on the side. Done! lol!

Thanks for checking out my Blogger's Challenge card this week! Have a great weekend!

Thursday, March 27, 2008

Tie the Knot 4


Whoa...where did Wednesday go? I can't believe I didn't post yesterday...didn't even think about it. I have been working on some class materials, so that is keeping me away from the computer. My Stamp Club meets tonight! Yeah!

Here is another of the Tie the Knot kit cards, using 1/2 the kit. I was excited to see additional samples in my Stampin' Success magazine (a magazine that Stampin' Up! sends to every demonstrator each month packed with ideas). I know I have a few more adhesive die-cuts that I can use to make up those samples, too!

The big flowers in these kits can be challenging to use, but I like how this one turned out. Again, I added an additional 1/2 sheet of Kraft Cardstock for the base, then simply layered on the designer paper and the adhesive diecuts. I used the Word Window and small oval punches for the greeting.

Have a great day! Check back tomorrow for Blogger's Challege!!!


Tuesday, March 25, 2008

Tie the Knot 3


Here is the next one in the series of full cards using the Tie the Knot scrappin kit. I love the saying on this one. I purposely left the greeting blank at the bottom so I could add it when I needed to use it. I think the oval looks so elegant on the stripe paper. I wrapped the wide 5/8 ribbon around the entire front of the card as a little extra detail. Very simple...but again I think it says elegance! The base again is Kraft cardstock.

I'm still planning my next few classes and I have some swaps coming up due soon. It is VERY quiet around here...everyone went somewhere for Spring Break I think! I remember when we took off for Florida this time of year. It is always nice to go somewhere warm.

I've been online checking on flights to Salt Lake City for our Stampin' Up! convention in July/August. Wow! Ticket prices are VERY high! Hope they come down soon. I'd hate not to go, but I'm not spending $400 on airfare either! Yikes!

Have a great day!

Monday, March 24, 2008

Tie the Knot again


Hope you had a wonderful Easter! We had a nice dinner with my family. It was sunny in Ohio, even though still a bit cool. I'll take it over rain/snow any day!

Here is the next card I made from the remaining pieces of the 1/2 Tie The Knot card class kit. I'm particularly fond of this one. I think it will make a great wedding or anniversary card when I need one. It is a full size card. The Scallop is made from the textured Chocolate Chip cardstock and popped up with dimensionals. The base is the Kraft cardstock included in the kit. I added some white taffeta ribbon.

I'm spending the day in my studio! Yeah! It seems like I was only able to get down there off and on last week. It has been a MESS from some reorganizing I've been doing. Today I'll be cranking out a lot of things for my classes coming up...and I have a couple magazine submissions to work on.

Cheers!

Saturday, March 22, 2008

Tie The Knot Scrappin Kit


Happy Easter weekend, everyone! I have struggled with a sinus migraine ALL day...sleeping most of it away! I'll probably be up all night! I did manage to make the Pumpkin Pie I'm supposed to take to my mom's tomorrow for lunch. My DH and I are getting together with my parents and my brother and his family. Both of my boys will not be able to make it. My eldest lives in Madison, WI and won't be making the trip. My youngest is on Ohio State spring break and will be travelling back from Florida (what a life!)

I promised those that took my Scrappin Card class that I would post several of the additional cards I made from the extras in the 1/2 kit. I used only the cardstock, die-cuts and designer paper contained in the kit for this one. It is a full-size card and I used the greeting from Lots of Thoughts...the recent Sale-A-Bration set. I added the Celery button in the center of the flower and the wide Celery ribbon across the bottom. I am absolutely in LOVE with the paper in this kit! I wish I could purchase it separately.

Hope you all have a very blessed Easter or Happy Spring!

Friday, March 21, 2008

Blogger's Challenge Week #39


Another Friday and time for the Blogger's Challenge! This week's challenge was to use the color combination of Soft Sky, Blue Bayou, Chocolate Chip and Real Red! By coincidence, I already had these colors laying out on my table. One of the techniques my Technique Class did last week was Ripped Marble (from the 8/05 issue of Technique Junkies). I love the textured look of this technique, and it isn't hard at all! For my sample, I used the new mini catalog set, Bloomin' Beautiful...I LOVE hydrangeas...and this set just CALLED for me to buy it. lol!

All three stamps I used...the Blossom definition, Bloom and the pot of hydrangeas are in that set. In addition, I used a piece of Aged Copper Hodgepodge Hardware and the NEW chocolate twill ribbon that is in the mini. That is NICE ribbon...has a great "hand" to it and very easy to work with. Along the left side of the red, I also pierced a row of holes.

I'm amazed...I actually woke up this morning with this idea in my head and it turned out pretty much as I thought it would! Do any other of you dream about card ideas? lol!

Wednesday, March 19, 2008

Classic Backgrounds Money Holder


Oh no! More snow here! We had thawed out and it was supposed to rain for a couple days...bringing out flood warnings in the area. Then...this afternoon it started to sleet and now SNOW! Oh well...by this time in March, you KNOW that it has to be one of the last snows of the season.

This was one of the 3D items I did for Leadership Display Maker using Classic Backgrounds. It is a tri-fold money holder with a belly band that slides off. Sorry...for some reason I didn't take a picture of it open! Although hard to see the center is actually a green Rhinestone brad. I used the stamp a ma jig to get the background pattern to line up correctly. The white scallop circle I backed with a Taken with Teal scallop circle to give it a little color. I used a black marker to just highlight the words "Wonderful Friend" and then used the Word Window punch. I used Certainly Celery and Taken with Teal...I like that color combo a LOT!

It's Wednesday and about time to watch American Idol...wonder who gets voted off tonight!

Tuesday, March 18, 2008

So Many Scallops


OK...tomorrow I am going to start working with all the new mini sets that I purchased! I'm working on my Tart & Tangy Stamp Camp projects, too. But, I wanted to share one more Sale-A-Bration card. I thought this turned out sweet. I made up a bunch of these (at the weekend retreat) in pink and blue to have on hand to send out. My hubby is always asking me for baby cards to send to his employees.

I'm really into quick and easy these days. Stampin' Up!'s designer papers make it SO easy. This card uses the Flowers for You designer paper (I also used the blues out of the same pack for the boy cards). I stamped the Sweet One from So Many Scallops on Whisper White and punched with the 1 3/8 circle punch, then punched the Scallop Circle with coordinating color Lovely Lilac. I used the Word Window punch and folded it in half, securing it to the scallop circle with a mini brad. Then I punched three small stars in coordinating colors. A small strip of Lovely Lilac cardstock hides the seam between the two papers. EASY!


Monday, March 17, 2008

Top O' The Mornin' To You


Happy St. Patrick's Day! I made up this cute little card over my stamping retreat weekend...he was certainly popular! I've seen several of the little leprechaun faces done by talented stampers so I had to try one, too. The beard and eyebrows are done with SU's scallop punch and the face with a circle. The hat and bands are done with squares and slivers of paper. I used some more of my East Coast Prep designer paper since it had Wild Wasabi in it and matched it with a More Mustard base. I think he turned out so CUTE!

I'm headed out to do a little SHOPPING today! I have a couple gift certificates burning a hole in my pocket! I also have a lovely week coming up...only one teeth cleaning appt tomorrow and the rest of it is FREE...I love weeks like this and I'm definitely needing it to recharge my batteries!

I'm sad to see Sale-A-Bration end today. It has been a fun one...I've loved using the stamp sets I've earned. They will definitely stay in my personal "stash". It isn't too late! Contact me by 11 PM Eastern time in order to get yours...and see my last post about the Class Kits I have available!


Sunday, March 16, 2008

Class on the Go Kit


For my classes, I recently adapted the Tie the Knot Scrappin Kit card class that Patty Bennett created. My stampers loved the classes and using the GORGEOUS papers and die-cut adhesives in this kit! It is truly so much more impressive to see in real life and they were so quick and easy to make! My stampers were in and out of class within 2 1/2 hours and completely finished.

Due to a cancellation after I had ordered their kits...I still have two Class Kits to Go available! Price of $25 includes 1/2 kit, standard envelopes, mini brads, dimensionals, stamped images and punched shapes to complete the twelves 4x4 cards! All you add is some final greetings and adhesive. You will have TONS of designer paper and die-cuts left to make additional cards... Kits include step-by-step instructions with photos of finished cards. Want the full kit? Add $10 to the price!

And...keep watching my Blog! I will have 5 additional samples of FULL cards using this marvelous kit! What are you waiting for? Email me today!

And...don't forget! Sale-A-Bration ends on Monday. Make sure you earn your FREE sets by placing a $50 order...$100 order get 2 sets FREE...$150 order get 3 sets FREE plus hostess benefits! And...as a BONUS...I'll give you two card ideas for each free set you earn! But, email or call me no later than 11:00 PM Eastern time on Monday, March 17 to take advantage of Sale-A-Bration and my Bonus offer.

Thursday, March 13, 2008

Blogger's Challenge Week #38


I'm early! I am headed out of town shortly, so wanted to post my Friday's Blogger's Challenge card before I left. This week we are to show a Birthday card...any age. Well...I needed one for my girlfriend AND I want to show her the Dahlia flower fold, so I combined the two for this Challenge! This was one of the cards I made this weekend at the retreat...I showed several people how to make this flower there, too!

One of my goals is to use up my retired Stampin' Up! paper. It is way too pretty to just be sitting on my shelf...so I pulled out this one using Perfect Plum, Pale Plum and Mellow Moss. Sorry, I can't remember the name of the designer paper, but the same pretty patterns are in the current catalog with the name Le Jardin...just different colors. I added a little bling with the center Rhinestone brad and some piercing around the edges. Finally, my go-to birthday greeting from It's Your Birthday. I added the same strip of designer paper from the folded flower to the band underneath for a little extra interest.

Well...got to run! Enjoy!
Connie

Wednesday, March 12, 2008

Time for You


Everyone should have received their swap packages, so I can finally show you what I made for the Control Freaks mega swap! I had to make 40 of them. I stamped the cute little clock from the Time For You stamp set in the Occasions mini and used my watercolor crayons to color it. I covered the clock face with Crystal Effects. The background paper is from the new Afternoon Tea designer paper and I also attached the awesome Chocolate twill with a staple! Love that ribbon...very easy to work with it.

Headed out of town tomorrow to do several classes...I'll be back to post my Blogger's Challenge card on Friday evening. I missed last week's, so I plan on combining the two challenges from last week and this week!

Take care!
Connie

Tuesday, March 11, 2008

Stitched Exotics


I'm playing catch up from being gone for several days...both on sleep and on my assignments. I have three classes this week...I've already designed the projects, just need to do the cutting and prepping and organizing the supplies. They are all out of town which makes it a little more challenging to get ready!

So, once again I have a sample of the Displays I made for Leadership using Stitched Exotics. This is a post-it-note box. I have another one like it sitting on my desk and love how it keeps them in one place. It is deep enough to hold both the 3x3 size and the smaller size on top. I used Heat & Stick Powder to glitter the flower and punched the leaves with the 5 petal punch from Faux Diamond Dust (Technique Junkies newsletter) cardstock. The Stripe DSP is from the retired Darling Doodles paper pack...I loved that paper and the colors! The center is a Build-a-Brad...those are so much fun to use!

Enjoy! We are digging out from our Blizzard and the snow is melting fast! Yeah!
Connie


Monday, March 10, 2008

I'm back! And Boho Backgrounds...


Whew! I made it back from the stamping/scrapbooking retreat late yesterday and am very tired. We had a BLIZZARD in Ohio! 20 inches of snow and Level 3 snow emergencies in the county where my retreat was held (no one allowed on the roads or you will be ticketed) and snow drifts up to the roof of the building. But it was so absolutely beautiful to see the snow falling, the snow on the trees and the unspoiled landscape all around.

The retreat workers were SO great...they were stranded, too! They brought food to us so we didn't have to walk over to the cafeteria...cleared off our buried cars...moved the cars so they could plow off the parking lot...then cleared the sidewalks down to cement so we could wheel all our stuff back out to load the cars. Meanwhile, we stayed nice and snug in the lodge with the fireplace going all weekend...it was awesome! I was able to get lots of things done and you'll be seeing them over the next few days! Need to get them photographed. The best part is meeting up with friends again that I only see two times a year at these retreats. Of course, I always take too much stuff with me and only get 1/2 of what I take done...even with all that time!

This is one of the 3D items I made for the Leadership Displays. I used the Boho Backgrounds stamp set. I wanted the medallion to look and feel like leather, so I used Really Rust, Creamy Caramel inks direct to paper, then stamped the medallion in Basic Brown over top. I then covered it with Versamark and clear embossing powder. Turned out pretty neat and looks a lot like leather! It is hard to tell, but I used two acrylic frames and tied them together using ribbon. I punched the holes on the frames with the Crop-A-Dile tool. The paper is cut from the retired Outlaw paper, but you could easily substitute the new Western Sky paper for the same look. The medallion is actually adhered with dimensionals to the outside of the frame, while the paper and cardstock is slipped inside the frame where the photo would normally be held. After I sent this in, I thought I should have used mini brads instead of staples on the calendar...oh well!

I've not heard from our Blog Candy winner, Catherine, yet! So if I don't hear from her by tomorrow afternoon, I'll be pulling a new number for someone to win that Blog Candy! Check back!

Thursday, March 6, 2008

And the Winner is......

Thank you all for commenting on my Blogaversary!!! It truly has been a FAST year. And I've been so blessed with all of you who visit regularly!

So...the winner of the Blog Candy is.....


Post #34


Happy Blogaversary :)! I love spring because the air seems to be fresher, I can go on more walks with the kids without bundling them up to the nines. To only then undress them so they can run to the bathroom, even though they claim they have gone before they put their gear on. Lol, anyways thank you for this chance at some great blog candy :)!
Hugs,catherine

Catherine...drop me an email with your mailing address and I'll get it shipped out on Monday.

I'm headed to a LONG weekend stamping/scrapping retreat. About 40 of us go twice a year and have SO much fun and get so many great ideas! I'll have tons of things to post when I get back. This is always my time to experiment and try new things because I can work in a block of time to finish it and not worry about classes coming up.

Looks like we are in the path of another BIG snow storm. I'm glad I'll be tucked up at the Lodge with no reason to go out...

Have a great weekend!

Wednesday, March 5, 2008

Published in Stampers Sampler!!!


Oh my gosh...I just found out that in addition to having my card in this month's Stamper's Sampler magazine, they have also posted it online in their preview pages! Scroll to the bottom of the page and check it out here! This is the actual card...their colors look a little washed out in the magazine compared to real life. I submitted it for their call for cards using Pins & Needles.

This time I did use Ginormous Flowers stamp set and cut the large flower out twice using Purely Pomegranate on Glossy cardstock. Then I punched the 5 petal punch from Faux Diamond Dust (Technique Junkies newsletter technique I use ALL the time) PP cardstock and then from the PP image on Glossy cardstock, securing in the center with a clear rhinestone brad from the Pretties kit. The petals are from Pick a Petal and stamped with Wild Wasabi on Glossy. The stripe paper is from Cutie pie and the background scroll from Baroque Motifs. I finally added the hat pin with beads from the pretties kit. I liked the shape of this card...an upside down flower pot!

Woohoo! It is a good day! (Well, other than being snowed/iced in and having to cancel my Stamping Club meeting this morning...boohoo!)

Connie

BLOG candy for my BLOG ANNIVERSARY!

This post will stay at the top until Wednesday night!


Did you notice? I have a new look for my ONE YEAR Blog Anniversary! Thanks to Michelle at http://www.blogstamper.com/ who designed my new banner and spent hours trying to find the right font. I think it turned out GREAT!

When I started my Blog, I never expected it to turn out as it has! I expected to use it for mostly my customers to get ideas from projects and cards I'm working on. I'm proud to say that I've managed to post frequently each week and have a "following"...thank you to ALL of you who check in frequently to see what I'm doing! I appreciate it!!!

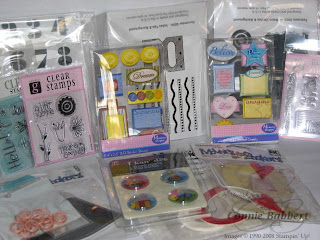
And...what did I say? BLOG candy! Yes! To celebrate the week of my Anniversary into Blogging, I am giving away Blog Candy. There is an assortment of unmounted stamps from The Scrap Pack...numerals, Index Tabs, backgrounds, and circles. Some Clear Stamps from Studio G that are TOO darling, several Shakers from I Kan Dee and Rebecca Sowers, Dimensional stickers from Memory Shoppe and other scrapbooking or stamping embellishments! You'll LOVE this assortment of goodies! Plus, I'm still organizing my Studio, so I may find MORE this week...you never know! lol!

What do you need to do? To celebrate my week, post a comment to THIS post telling me the ONE thing you enjoy MOST about SPRING! (Yes, I am wanting to see Spring BAD!) I'm figuring since it is March 1st, that it MUST be right around the corner? So...maybe you can help me bring it here a little faster! You have until Wednesday night, March 5 @ 7:00 PM to submit your comment. My Blog is moderated, so you will not see your comment post until I approve it!

Many THANKS!
Connie

Tuesday, March 4, 2008

Boho Backgrounds Zoo page


A rainy day here...lots of rain! At least it isn't snow...but we are hovering right around that temperature. Of course, I'm supposed to head out of town in the morning, so I hope it stays rain and doesn't turn into freezing rain or snow.

Thought I'd share another scrapbook page I made for the Displays at Leadership featuring the assigned set Boho Backgrounds. A couple pictures of my adorable niece and nephew visiting the zoo...aren't they cute? My brother captured their pictures hugging the cement penguins.

Along the left I used the Spiral punch on Basic Black cardstock. The medallions have a jumbo eyelet in the center, and I used the scallop punch and two Round Tab punches beneath the scallop to make a circle around it. The tree is the Origami folding pattern...it is fun to make the pattern/tree as small or large as you want, depending on the size of your paper! This was a fun page and one that came together easily. I pictured the left row of medallions on a page as soon as I saw this set.

Enjoy!
Connie

Monday, March 3, 2008

Fabulous Flowers

Edited: One of my customers just called me out on the name of this set! It is Fabulous Flowers, of course...silly me!!! Thanks, Pat!!!

It is a busy week for me! I have a couple classes that I'm still getting ready for...one is out of town. And I leave Thursday for a weekend stamping/scrapbooking retreat! I can't wait! I go twice a year to this same place and just have the best time...of course, I come back exhausted from staying up too late every night! lol! Oh well...the price you pay for the love of your craft...right?

I love the flower in this set...Fabulous Flowers...it was on the first order I placed when the last catalog was new. You can get so many different looks by changing colors, adding 2-3 colors, layering, etc. I made this card for a Embossing Challenge on one of my groups. The challenge could be to use either powder embossing or dry embossing. I chose to use both on this card.

The background is dry embossed by hand using the Pick A Petal brass template from Stampin' Up! I used one of the small flowers all over the background. The large flower was stamped with Regal Rose Craft ink and then I used the Cracked Glass technique (Feb/March 2008 Technique Junkies newsletter) to cover the entire flower with a shiny layer. I didn't use the option to age the "glass" since I wanted to use a white background. Happy Day is actually a Rub On from the Love & Happiness Sell-A-Bration selection. I covered the back of the clear button with coordinating designer paper, along with adding the stripe of designer paper on front...both are from the Flowers for You package.

Enjoy!
Connie

Sets: Fabulous Flowers, Love & Happiness Rub-ons
C/S: Tempting Turquoise, Whisper White, Lavender Lace, Flowers for You DSP
Inks: Regal Rose Craft ink, Versamark
Other: Glassy Glaze EP, 5 petal punch, Pick a Petal brass template, stylus, clear button, dimensionals, Celery grosgrain ribbon